.png)


Dec 18, 2024
Dec 18, 2024
Tech.IT Forward #4: Tổng hợp Q&A
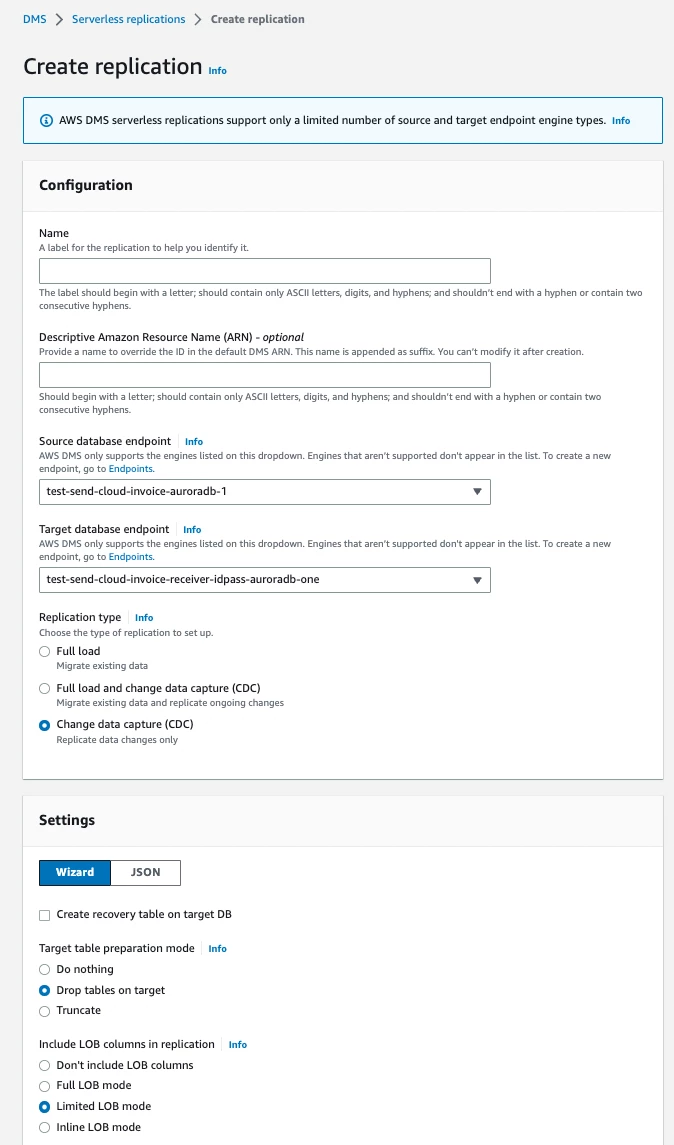
Còn cho đi là còn mãi, chúng mình xin gửi đến cộng dồng IT những câu hỏi đã có lời giải từ các diễn giả Tech.IT Forward Vietnam. Bài viết có sử dụng xen lẫn tiếng Việt và các từ tiếng Anh để tương thích với ngôn ngữ làm việc giao tiếp hàng ngày của cộng đồng.Q1: Làm thế nào để dừng tình huống member cố tình delay 1 task qua nhiều sprint (1 tháng) trong khi 1 sprint chỉ có 2 tuần? Nếu team làm việc theo mô hình Scrum mà không có QC/QA thì làm thế nào để đảm bảo chất lượng chương trình?A: Để tránh member delay 1 task qua nhiều sprint mình có thể a